How I Made My Classroom Rules Decor
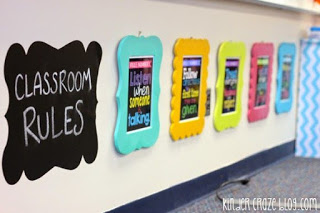
This year, my grade level moved hallways, which meant a lot of packing and unpacking. Since I was moving rooms, I took it as an opportunity to refresh my classroom decor. I had been searching all over for some classroom rules inspiration on Pinterest and found one pin that kept catching my eye from kindercrazeblog.com.
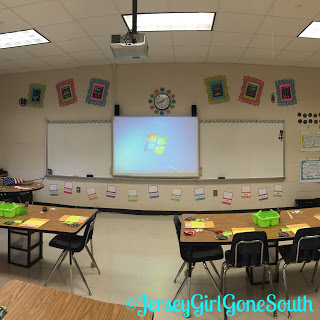
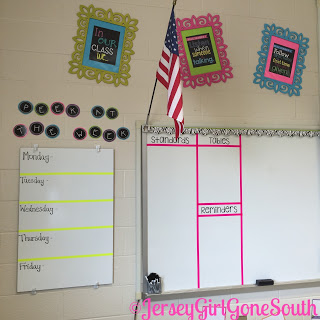
In my classroom, there is always one spot that really irritates me because I can never find something big enough to take up the space above my whiteboard. The whiteboard stretches almost the entire length of the front wall. After seeing this pin, I thought this would be the perfect spot to display my new classroom rules decor!
Gathering My Supplies
I read kindercrazeblog.com‘s post about how they created their rules with subway art and wooden frames. I was so bummed to find out that they got their frames from Michaels, but they are much more expensive now. She got them for $3 each and in the store they are $7.99 now! Since I needed 6-8 frames and was not looking to break the bank on this project.
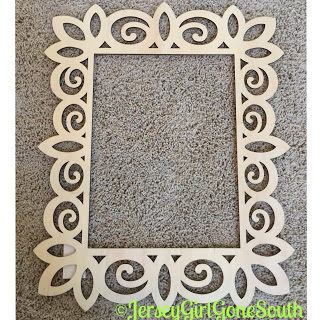
I headed to Michaels to see if I could find a cheaper alternative. After searching most of the store, I was about to give up. And then… I found the 50% off aisle! They had various frames, but only 1 or 2 left of each. There was one style that had a bunch, so I made it work! The frames I found (similar to these) were not exactly what I had in mind, but I figured I could make it work! They were $3.50 each and I had 25% my entire purchase coupon! As a result, I got 6 wooden frames that had an 11×14 inch opening for $22 dollars!
The Next Steps
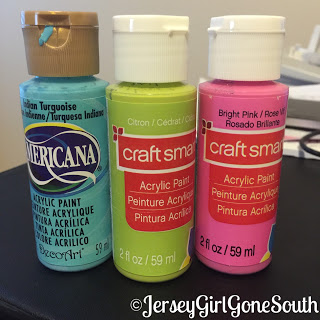
In kindercrazeblog.com’s post, she spray painted her wooden frames. I knew this would be easier, but it was much more expensive, since I wanted different colors for each frame. Instead of buying spray paint, I bought acrylic paint and paint brushes. All of those twists and turns in the wood scared me, but the acrylic paint was $0.69 a bottle! SCORE! I purchased three different colors: Craft Smart Bright Pink, Craft Smart Citron, and Americana Indian Turquoise.
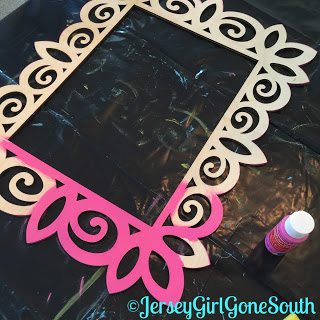
I’m not going to lie, painting the frames was not the most fun/easy thing to do. It took two coats of paint and I didn’t worry about the inside edges of the frame, just the outer edge.
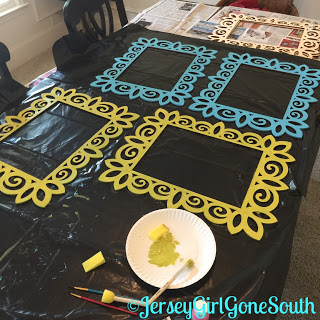
After I was finished painting, I let them dry for 24 hours. I tried to recreate my own subway art classroom rules, similar to the ones in Kindercrazeblog.com’s post. Honestly, it was time consuming and didn’t look nearly as good, so I ended up buying the ones in the blog by Maria Manore Gavin. You can find them here.

My issue was there was only 5 classroom rules and I wanted 6 frames. 3 on each side of my clock on the front wall. So, I made my own “In Our Class, We…” sign. FREEBIE ALERT: You can find it on my TeachersPayTeachers here: In Our Class, We… Subway Art Poster FREEBIE
Putting It All Together
My issue with the printable signs was that the wooden frames fit 11×14 photos and I could only print the paper 8.5 x 11. So, I printed the subway art in color and glued it onto bright colored construction paper that I had in my classroom (you can buy this at Staples, OfficeMax, HobbyLobby, etc.) I glued two pieces of 8.5 x 11 together to fit around the entire piece of paper. After gluing them together, I laminated them to give them a little more structure.
Now came the fun part: hanging them up! This required hubby and a ladder. I taped the laminated posters up temporarily to make sure they were spaced correctly. Then, I hot glued the laminated posters up in their correct spots above the whiteboard. After I hot glued, I used Scotch Mounting Squares that I had purchased from Target.
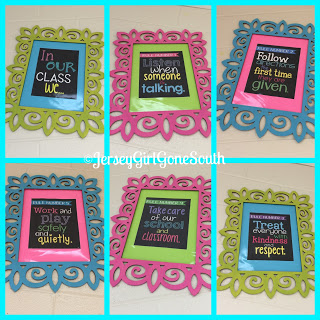
I am so happy with how these turned out! It is a focal point in my classroom and I love that I can reference my classroom rules decor easily throughout the year! Here are a few more pictures!



Leave a Reply